Waiting for the spring to sit in our DIY sofa!

onsdag, april 10, 2013

Today I have a day off from work! Arranging with different things at home and hoping that the spring will come with sunny afternoons soon. Right now, I am looking forward to sit in our own DIY sofa at our terrace. This is the biggest DIY we have done so far for sure! I am happy for the sofa and the colour has been even more beautiful know during winter. Giving the sofa that special patina.


Pictures: Make-Living


What about you, have you been able to start preparing for the outdoor living yet?


Holiday!

onsdag, mars 27, 2013

Today I am having a day off from work. The sun is shining here in our little city, and it is just so nice to be home to plan Easter. We will have our parents visiting us, and right now, I am planning activities and food for the weekend coming up.

What will you do for the Easter? Do you have some special food that you make?

So far, I have not had time to decorate for Easter except this tiny table set-up below, but will get started today. The second picture shows the week calendar that I made as a little graphical DIY earlier. It is available for you to download here if you like.


Pictures: Make-Living


Tomorrow I have a little something for you...remember I had a secret that I will share with you. Well tomorrow is the day. Stay tuned!


Starting on the little baby boy room

fredag, mars 15, 2013

Hi all!

Jumping in quickly to wish you all a wonderful weekend. We have recently started on the little baby boy room, and we will continue the make-over for some time (so you know what I will do this weekend).

Here are some before pictures of the room. Can just be better :) Right now I have finished painting a changing table. Will share before and after pictures later. Can´t decide if I shall paint one tiny wall in the room like the first picture here.


Picture: lily.fi


So you Monday again. I better get started now!


DIY inspiration from Trendenser

onsdag, mars 06, 2013

I found these DIY projects at Trendenser that I just have to share with you. We are as we speak in the middle of our own bigger DIY projects, but more about that later.

Now take a look at the cavalcade of inspiration below from Frida Ramstedt at Trendenser. Wow!!!


More information how to create the lamp above step-by-step you will find at Trendenser.
Frida is such a talent taking photos. The picture below is an amazing watch
wall and the last one showing how you can play with washitejp on the wall, instead
 of using frames.


Pictures: Frida Ramstedt
 
So many cool idea's for very little money. Which one is your favourite?


Maybe another DIY?

måndag, februari 25, 2013

Hi there! How was the weekend?
We have had winter holiday now for a week, and today is the first day at work again. Puhhh hard to get up in the morning again...

But I have two lovely things to share with you this Monday. First I have my first sponsor, Lorena Canals!!! Lorena Canals, has a lot of wonderful carpets made of cotton for children. To celebrate the new sponsor, I will get back later this week with a Give-away together with Lorena Canals.

The second thing, is that I found this lovely little DIY inspiration today at a Swedish blog called hitta-hem.blogspot.se. The DIY project is a book, or magazine shelf (see pictures below), and such a brilliant idea.


Pictures: hitta-hem

The blog owners, Maria Ramse and Pella Hedeby, have more than 10 years experience within interior design, working for JM AB. You can tell they have a lot of experience by these stunning pictures.
I just love it all, especially the Kay Bojesen wooden monkey,  designed in 1951...


DIY & Give-away: Week Calendar

fredag, februari 22, 2013

So finally I can share my latest DIY project and my Give-away to you this week. My DIY is the week calendar that I have mentioned earlier that I have had in mind. With this DIY it is easier to plan the coming week, both related to dinners, activities etc for the family. Below are some pictures from our kitchen where the calendar is located.


This Give-away you can download and print yourself, you find it here. The size is 50 x 70 cm and the frame I have used, is the one from IKEA called Ribba. Ribba is available in different colors such as black and white, and when you have it behind glass (as picture 2 above), you can easy write on it.

We have used the same kind of frame as for our other posters in the kitchen. The poster below is from Fotografiska and Vee Speers is the creator.


Pictures: Make-Living

Above in the kitchen, String shelf in walnut and soft pink color. See you all on Monday again.


Black walls and our home!

måndag, februari 04, 2013

Hi all and hope you had a great weekend! As so many times, we have had 110% speed through Saturday and Sunday, and suddenly there is a new week again.

But after these two days off from work, the week calendar is ready and created. Jihoo! If everything goes according to plan, I will print it today.

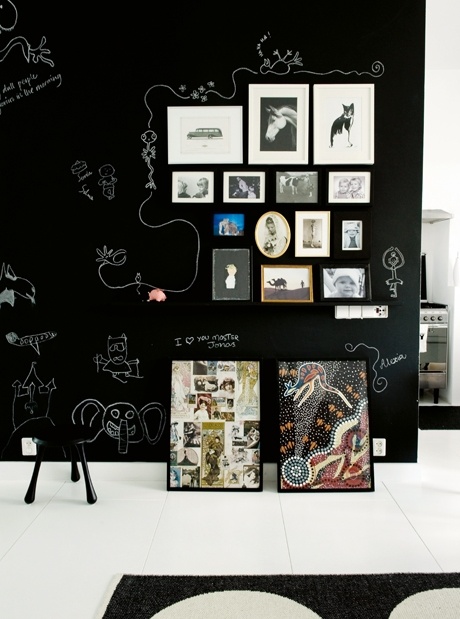
Today, I am having a theme, Black walls as I found these lovely pictures at Pinterest. The first picture is so cute, and with Valentine´s touch. Any special plans with your dear ones for Valentine?! I have to start plan right away.


And the last picture is from my own home, that has got black walls lately. The kitchen.
A String shelf on the wall, and the chairs by the bar is from BoConcept. The grey lamps is Aröd from IKEA and is a special DIY project as they does not exist as wall lamps. I just love this construction that we made.

 Pictures 1: Poppytalk  2: Unknown 3: Keltainen Talo Rannalla 4: Make-Living   

Have a great Monday and see you tomorrow again!


Christmas tree - DIY

söndag, december 09, 2012

Second Sunday of Advent! And I am so excited. Today I have a guest post at My Scandinavian Home blog. I am sharing my latest Christmas DIY project that I have created together with my man. Yes he get´s involved in one way or the other. But I think he actually likes is.
This Christmas tree DIY idea came to me when I saw a picture of a similar one over at Tierlantijn but couldn't order it. I hope this little Christmas DIY inspires you too! :)


This Christmas tree is quite neat. You can make it as big as you like, and can have it both indoors and outdoors. And the best thing is that it lights up any dark space at home without needles all over the floor…..And you can use it year after year!!!  


       What you need:
  •  One wood panel approximately 7 cm wide for the tree trunk, which you can make as tall as you like ( mine is about 1 meter)
  • A number of 7 cm wide wood panels for the branches (I have used 7). Cut the branches in staggered lengths so that they form the shape of the tree you would like. I made a triangular template in the shape I wanted and then cut the branches according to this.
  • Nail the branches onto the trunk at an approximate distance of 5 - 7 cm
  • I used a special grey wood stain (not paint) to give the wood an old touch 


Pictures: Make-Living
Today we will buy our real Christmas tree as well, because I like to have both!!! I would love to hear about your Christmas DIY projects as well. Maybe it is interior projects or is it your best cooking recipe that you do every Christmas? Leave a comment below! Happy 2nd Sunday of Advent to you all and see you soon again.

1st Sunday of Advent

söndag, december 02, 2012

Ohhhh today has been such a great winter day here. The entire city is covered with white fluffy snow. Perfect Advent! And when we finally get snow we usually get some sun as well. Did you have a great weekend and what did you do?


This weekend I have finished the Christmas DIY project that I started some time ago and will share with you soon. Christmas is just the perfect DIY time of the year. The star on the picture here is one of my little projects last year. I used nails but lace will also work just fine. I think that this star was one of the most popular DIY before Christmas last year after Tine K showed here collection last year. You can find it at many blogs out there :)


Finally after a busy day here it is time to just relax and read a book. Wish you all a good start of the week and see you soon!


DIY - Advent Calendar

måndag, november 26, 2012

One of the latest DIY projects that is perfect to involve the kids in. The idea was from Stylizimo and I thought it was such a fun project that I had to make my own. A little more color, and a little more narrow but quite ok in the end :)


The inspiration was all from Stylizimo, and you find it all here. The only thing that I have changed was to add another star in the top "bakform" and I used a canvas as background. Now it is time to buy all the gifts for my calendar. Better hurry!!! Have a lovely evening all! 


Advent Calendar - DIY from Stylizimo

måndag, november 12, 2012

Christmas feeling yet? Well I have started to plan a few projects and I just need some help from my man with a few things and then I hope I am ready. But until then, I would like to share a lovely Christmas DIY from Stylizimo with you all. An advent Calendar that was done by the owner of Stylizimo. So nice! Don´t you think?


Photo: Nina Holst

Such a great DIY project from Nina Hols! Detail description how she did, step-by-step could be found here. Take care!

DIY - Taklampa

onsdag, november 07, 2012

Ja vad var det som hände!? Det var ju otroligt länge sedan jag tittade in här. Ibland räcker inte energin till allt man vill helt enkelt. Men nu var det dags tycker jag.
För ett bra tag sedan besökte jag mina kära föräldrar, och pappa hade lagt undan lite saker han hade hemma till mig. När jag fick syn på den här mässingfärgade saken kunde jag inte låta bli att ta med den hem till Skåne. Det hade tidigare varit en kabelvinda av något slag. Men en lampa var det som jag hade i tanken när jag såg den. Så det fick det bli. Sladden köpte jag på Lagerhaus. Sladden finns i flera färger, bland annat turkos vilket hade blivit riktigt fint det med.


Vad säger ni? Hade en lampa i denna modell fått komma hem till er?

DIY - Fixa&Dona

fredag, oktober 19, 2012

Äntligen fredag! Hoppas ni mår fint och laddar för en helg med mysiga planer. I Skåne, ja nästan hela avlånga landet har de ju lovat mycket sol, så hoppas att kameran kan få komma fram i helgen. Vill ju visa vårt nyrenoverade kök som vi nu håller på att inreda. Ångrar inte en sekund att vi målade golven vita. Även om det innebär mer städning, för det gör det...Den här veckan tittade jag in till denna rutinerade tjej, Fixa&Dona. Hon har alltid något på gång, och en idé som jag gillar speciellt är den nedan. Handtag på skåp i form av läderhandtag (läderremmar).  Skulle gärna vilja ha det i vårt badrum som vi planerar renovera längre fram. Visst är det snyggt.


 Foto: Hildur Blad/fixaodona.se
Tack Hildur för att jag fick visa dina bilder! Ser fram emot fler kreativa projekt (DIY) hos dig och lycka till med det egna företaget.

DIY - Flaggor på rad

lördag, oktober 06, 2012

Hej lördag och fler DIY projekt! Förra helgen var det regnigt och riktig känsla av höst infann sig. Så förra helgen passade jag på att fota ett litet DIY projekt som blev av i all hast tidigare detta året. Ett litet projekt som man lätt gör själv och som passar perfekt i barnrum. Några stuvbitar i tyg och symaskinen fram. En bit snöre och sedan klippa tyget i formen av en flagga.


Nu en uppfriskande powerwalk med bästa syster. Önskar er en fin kväll!


DIY - slingrande kreativitet

torsdag, oktober 04, 2012

Har gått runt med fredagskänsla idag torsdag i hela kroppen. Tror nog ni vet den känslan. Vi har nämligen en semesterdag imorgon fredag. Så skön känsla. Ikväll har jag hittat det sötaste Gör-det-själv (DIY) projektet via Sofia som har bloggen Mokkasin. Är inte detta det sötaste projektet med denna pappersgirlang?! På bloggen Mokkasin hittar ni hur man går tillväga. Så vackra färger mot det vita.


 Tack Sofia för att jag fick låna bilderna och för fin inspiration. Nu börjar vår mini-semester!
Hoppas ni får en fin start på helgen!


DIY - Bokstäver med glöd

söndag, september 30, 2012

Ja men vad säger man. Trillade över detta lilla DIY projekt via bloggen Sugar & Cloth som såg så spännande ut. Bokstäver kanske man skulle kunna hitta på Panduro eller liknande?! Kreativ tjej verkar det vara i alla fall som har kommit på denna idé. Och kanske blir det ett liknande projekt framöver. Har en hel del projekt i mina tankar men ska bara bli klar med de större projekten först...som våra golv.
Kunde inte för min värld tro det skulle behöva målas så många gånger. Men hallen är nu klar i alla fall. Så det dröjer lite till innan det bjuds på bildkavalkad, ha ha! Nej nu njuter vi av detta fantastiskt fina projekt!


Vackert och perfekt projekt nu i höst då mörkret börjar smyga sig på.
Ha en fin vecka!


Related Posts Plugin for WordPress, Blogger...

MAKE-LIVING All rights reserved © Blog Milk Design Powered by Blogger